Zoodles. Zoooooodle. Zooooooooooodle. For those of you less weird, zoodle = zucchini + noodles. Think of this as the summer cousin to winter’s spaghetti squash noodles. It’s another perfect sneaky pasta swap-out.
BEST FOR- It really depends which you’re talking about. The pesto takes a bit of time but is an awesome & super flavorful dairy-free pesto alternative. The zoodles are super super fast and a perfect seemless pasta swap.
MUSICAL PAIRING- “Fever” by the Black Keys
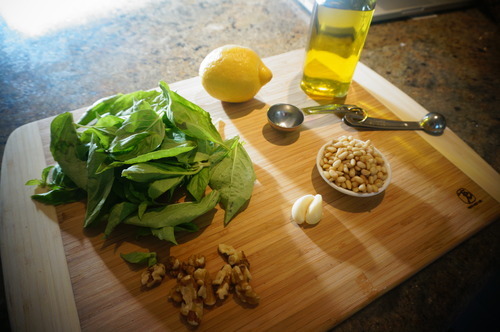
PESTO INGREDIENTS
1 cup fresh basil
¼ cup spinach
2 cloves garlic
3 tbs. pine nuts
1 tbs. walnuts (may be optional, see note)
1 tsp. lemon juice
¼ tsp. salt
3 tbs. olive oil
1 tbs. water
4 flakes red pepper (optional)
PESTO DIRECTIONS
- Pan sear nuts over medium heat in a little bit of olive oil (like a teaspoon, I honestly didn’t measure) for 5 minutes, until browned. Stir occasionally.
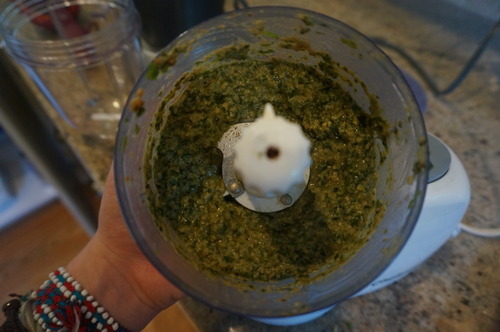
- Place all ingredients in food processor WITH THE EXCEPTION of the olive oil. Warning: because there’s no liquid in here it’s going to sound awful. Your dog may run away (sorry Bella). Continue on. When it seems like the chunks wont get any smaller or your ears can’t take it anymore, progress onto step three.
- Scrape down chunks from the sides that may be evading the blade. Then, slowly poor in olive oil, one tablespoon at a time. After each tablespoon, run the machine for about 10 seconds. Once all the olive oil is in, continue to blend for 10 seconds, then add in the water. Run until smooth (depending on the strength of your machine it may take a bit). Now is the time to add in the red chili pepper flakes if you want an extra kick, but it’s totally optional.
PESTO NOTE: I added in walnuts because in my experience making dairy free dressing and dairy free cream sauce, walnuts tended to help deceive the dressing/sauce into having the consistency of dairy. I’m not quite sure if they added anything to this pesto, but they definitely didn’t subtract. You could try not adding them in if you’d like, although they do provide a healthy dose of nutritional benefits.
~~~~~~~~~~~~~~~~~~~ ONTO THE ZOODLES~~~~~~~~~~~~~~~~~~
ZOODLE INGREDIENTS:
1 large or two medium zucchinis per person (they shrink when cooked)
Olive oil
Cheese Grater
ZOODLE TOPPING SUGGESTIONS:
Sundried Tomatoes
Cherry Tomatoes
Pine Nuts
Pesto above (although premade or tomato sauce or olive oil would be yummy too if you’re in a time crunch!)

ZOODLE DIRECTIONS
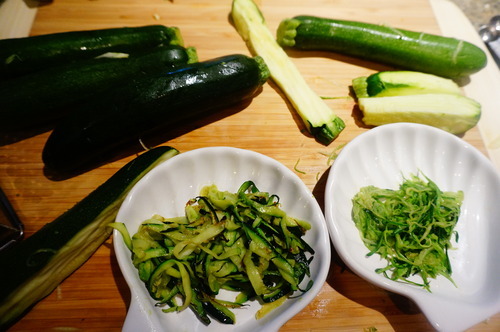
- All the recipes online for zoodles require a mandolin or a julienne peeler. I thought I ordered one on Amazon. I was wrong. Luckily, I realized a cheese grater works just as well and who doesn’t have a cheese grater? So, grab your cheese grater and your zucchini and you’re ready to get started.
- You have a choice to make. You can make all difference sized noodles from the cheese grater. I used two sides to make a size medley. Simply grate in long, fluid movements in an downwards motion until you reach the seeds. Once you reach the seeds, turn zucchini to another side. Continue until you’ve covered all sides. Then get a new zucchini. I alternated between the big holes (see photo above) and smaller ones for each zucchini. See notes section for more zoodle side info.
- Heat up about a tsp. of olive oil in a large sauté pan. Add bigger zoodles. Stir frequently. A minute later, add smaller zoodles. Cook for about a minute. You’ll know when they’re done by taste and heat, trust me. I’ll be surprised if they’re on the stove for more than 2 and a half minutes total.
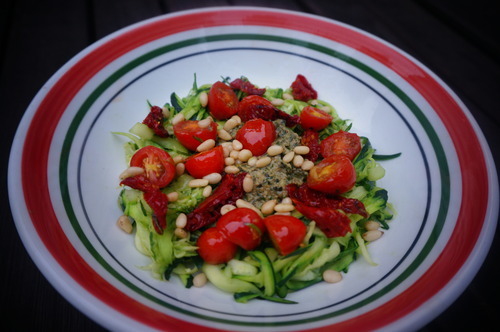
- Plate, add toppings, and serve! You’re done!


ZOODLE NOTES:
- As I said, most people use handy contraptions like this or this or this. I had fully intended on buying a mandoline/peeler/spiralizer pre- resorting to a cheese grater, but now I see no need to buy yet another kitchen appliance. However, if you’d like to, those are the links above.
- Having trouble grating? Grate downwards against the grain of the grater. You may have to scrape the zucchini out from the inside if making thinner noodles. Also, the smoother and more consistent your movements, the longer the string of noodle will be.
- Choosing what side of the cheese grater was a bit tricky. I went with these two sides below. You can see how the cooked zucchini turns out after using the large and small holes.